by Mike Rosenberg | Jun 9, 2017 | Digital Marketing, How To, Posts, Resources, Social Media
My second installment in our “Back to the Basics” series. The first was driven by a specific client request for help optimizing a LinkedIn company page. So naturally, we move on to the most popular social network, Facebook, for the same kind of post.
We will again assume that you have a page already, but if not, simply go to facebook.com/pages/create and start by selecting what type of business you have and follow the instructions from there. Note that each category is different and it will ask you for unique information. If you are not sure what type of page to create check out this post on How to Determine What Kind of Business Facebook Page to Start.
Since this is a “Basics” post, I am not going to focus on Facebook Business Manager. However, if you have or plan to have multiple pages and/or run Facebook advertising campaigns, I recommend using Facebook Business Manager. The page elements and strategies are the same, but it is easier to switch between pages and to NOT accidentally post as your page when you want to post as yourself and vice versa. Don’t worry if you do not know if you will advertise or have multiple pages as you can always switch to Business Manager in the future.
Whether you are creating a new page or editing your current one, here are some tips for the overview section. I am going to use a side project podcast (which I’ll create as an “Entertainment” page) for this example:
Page Name
Use the common name for your organization. It does not need to be your legal name (leave off the LLC, Inc., etc, unless you are identified that way). Think about how your page should come up when someone tags it on Facebook. I suggest not having something too long or descriptive.
Use Page Tips
Page Tips will provide suggestions for the basic elements you need to fill out to complete your page. Of course, there will be some marketing messages from Facebook about expanding your reach through advertising, writing effective posts and inviting friends to like your page. Follow those at your own discretion.
Short Description
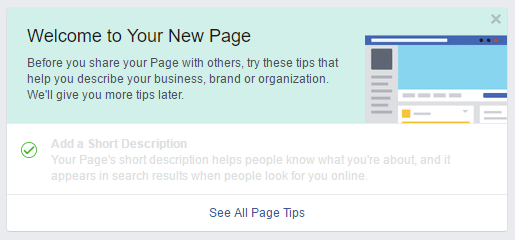
You get 155 characters to say what your page is about.
Add Your Website
Here is where you can link to your website or a specific page on your website.
Help People Take Action | Create Button
There are several options for types of buttons to use for your primary Call-to-Action (CTA). You will decide which button to use based on what type of page you have created or your marketing and sales goals via Facebook. Here are the preset button options:
Book Services – use if you want people to book an appointment, book travel or start a food order.
Get in Touch – do you want people to reach out for more info? You can choose between the following “Get in Touch” options:
- Call Now
- Contact Us (drive people to your contact us form)
- Send Message (via Facebook Message)
- Sign Up (typically for an email subscription or the like)
- Send Email
Learn More – link to a video on your website or Facebook, or take them to another page to learn more
Make a Purchase or Donation – drive sales or donations
Download App of Game
Note that there are several third-party apps you can connect to your button on Facebook. Evaluate and use at your own discretion.
Know Friends Who Might Like Your Page? | Invite Friends
Want to kickstart your page fandom? You can invite your friends to like your page…just be careful to not spam them. For example, if your page is for a local Portland business, only invite your friends that live in the Portland, Oregon Area. Once you click on the “See All Friends” button, you will have several options to manage whom you invite.
Settings
I’m just going to highlight the top settings you need to focus on. Ideally, you will go through every setting and update/customize it for your business page. Some of them are obvious and just leave them on the default setting (e.g. Page Visibility should be set to “Page Published” unless you don’t want anyone to see it yet).
General
Most of the “General” setting will go unchanged, but you have the ability to target specific audiences and restrict what people can do and/or see on your page.
Edit Page
Templates – by default your template will be set to “Standard,” depending on the type of business, you may want to change the template you use (Facebook may suggest specific templates based on the type of page).
Tabs – you can edit what Tabs to show and the order in which they are listed. There are additional Tabs that can be added and ordered as you like. Hide tabs that are irrelevant or do not have any content (e.g. hide the YouTube tab if you don’t have a YouTube channel). See more about each tab below.
Notifications
You can control what Facebook notifies you about and how to receive those notifications. I suggest only receiving emails for important notifications and turning all Text Messages off.
Tabs
Here is a bit more detail about the various tabs you can feature along the left side of your company page:
About
GENERAL
Edit your Category and Name if needed.
Create Page @username – note that you may need to have some page “Likes” before you can create a @username and it is very difficult to change a @username, so choose wisely. I suggest starting your user name with your primary company name. Think about how someone would begin to tag your company page in a post. For example, our company @username is currently @trueveracity. Not ideal. We chose this because our website URL used to be trueveracity.com (and @veracity was taken). We are trying to change our @username, but it is not easy.
STORY
Edit story – this is where you can provide a complete description of your business page. While Facebook does not provide a specific word or character limit for your story, it will be truncated with a “See More” button after about 400 characters (+/- 50 words).
CONTACT INFO
Pretty straight forward
Add any “Other Accounts” you want to be connected to your page including:
- Instagram
- Twitter
- Snapchat
- YouTube
- LINE
- WeChat
- Kik
- Pinterest
MORE INFO
Edit this section as needed
Picture & Cover Photo
Take the time to create and resize your picture (the square image that will appear on all of your posts) and cover photo (image at the top of your page) to fit Facebook’s specifications. The dimensions for your picture are 160 x 160 pixels with a square layout. For a company page, this should typically be your logo. Cover photos display at 820 x 312 pixels on computers and 640 x 360 on smartphones (image must be at least 399 x 150).
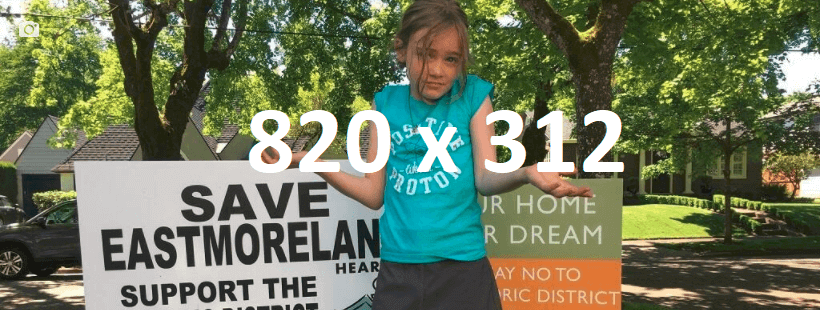
Also, you can either choose to pick an image that will last a long time, like a version of your logo, a headshot for an artist or public figure page, a team photo or something else that represents your company/page. Or, you can change your cover photo on a regular basis to reflect what your company is up to, some important announcements or the like.
Posts, Groups, Videos, Photos, Reviews, Likes
Once you start posting and sharing content (videos, photos, etc.) you can select what you want to feature on each of your tabs. You can also select if you want to show reviews and likes, and to feature and link any groups you are a part of to your page.
What should you share?
Now that you have your page updated and you’ve invited some friends to like it, what do you do? You need to “Write something…!”, share a post as Facebook calls it.

There are four main items that can be shared from a company page; text, photos, videos, or links. All can be combined into one post too.
What to share: these are your thoughts, articles or blog posts that your target audience is interested in. The best sources are your company and industry content, such as:
- Content you create (blog posts, white papers, how-to guides, etc.),
- Media hits or other content the company &/or employees are mentioned in,
- Stuff your employees publish,
- Content from partners (channel partners, vendors, nonprofits you support, etc.).
(remember to @ tag people and companies)
Sharing photos, videos and updates are also good ways to keep your page content fresh and interesting. Videos tend to have good engagement and you can even share live video content (plus re-share it later), numbered lists get shared a lot and posts with a link typically perform better. There are hundreds, if not thousands, of blog posts about what makes good Facebook content. Here are a few to read, try searching for specific tips within your industry or page category for more targeted articles (e.g. Facebook business page tips for accountants):
What else?
Scheduling posts: Facebook has a good interface for drafting, scheduling and even backdating posts. However, if you are going to post the same (or similar) content on more than one social network, or are looking to be more efficient, you may want to use a third party tool/app like Buffer, Hootsuite or CoSchedule.

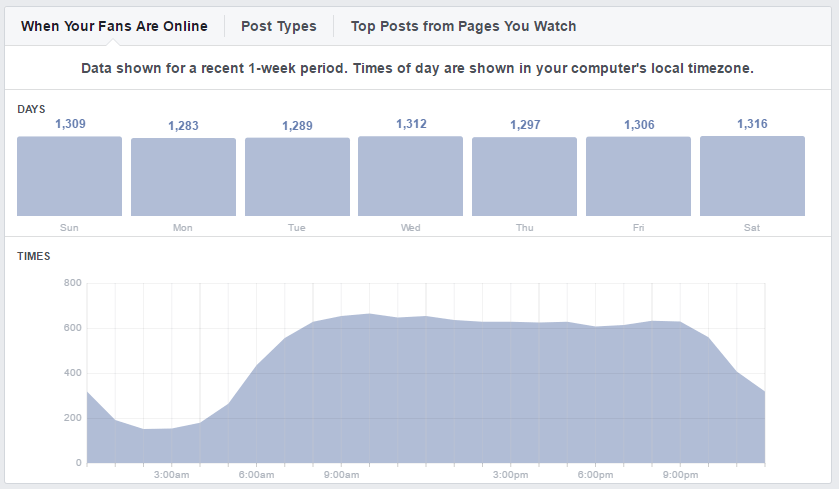
When to post: The first step is to look at your Facebook Insights and see when your audience is active. Then test out various posting times and types and see what has the best engagement with likes, comments and shares. A mistake we often see is to “only” post on weekdays on Facebook. We have found that most audiences are still active on Saturdays and Sundays on Facebook.
Page notifications: Another tab on the settings page is to manage your notifications. There are currently ten different notification settings you can turn on or off. You can also select how you receive the notifications you have turned on, via Facebook message, email and/or text. If you choose to be notified by email, be aware of what email address you have set up to receive notifications. Users often have a personal (gmail, yahoo, etc.) email address for their personal Facebook page. This is fine, but if you don’t frequently check that email account, you may want to consider either changing your primary email or using Facebook Business Manager.
That about covers the basics for setting up and at least initially optimizing a Facebook company page. If you have specific questions please feel free to ask in the comments section (or on our Veracity Facebook company page).
If you are looking for advertising advice, check out How to Optimize Facebook Advertising in 7 Steps.
by Mike Rosenberg | Feb 22, 2017 | Digital Marketing, How To, Posts, Resources, Social Media
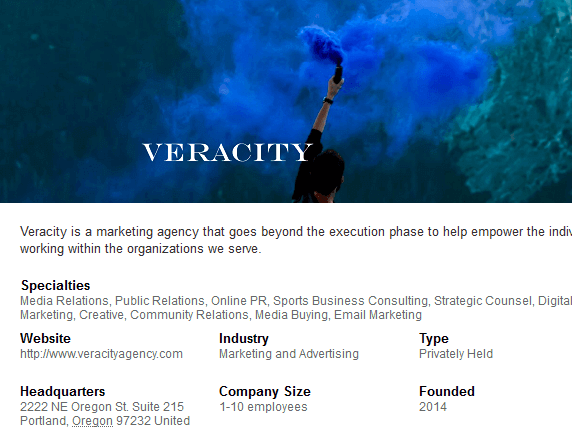
I recently was helping a client get their LinkedIn company page optimized (well really just set up as they had a page for a while, but they didn’t create it or manage it) and thought, this isn’t an uncommon problem…and I need to write a blog post (plus create curriculum for our upcoming Coaching Program).
We will assume that you have a page already, but if not, simply go to Interests>Companies and click on the yellow “Create” button. It is pretty intuitive from there, but if you have questions or run into problems, LinkedIn has answers.
Whether you are creating a new page or editing your current one, here are some tips for the overview section:
Company Name
Use the common name for your organization. It does not need to be your legal name (leave off the LLC, Inc., etc, unless you are identified that way).
Company Description
You have 2,000 characters here, but only the first two lines will show by default. So whether you decide to keep it short and sweet or use all of your allotted space, make sure the first sentence or two conveys who you are, before visitors have to click “See more ∨”
Image & Company Logo
Take the time to create and resize your company image and logo to fit LinkedIn’s specifications. 646 x 220 pixels or larger with that same aspect ratio for the page image. 300 x 300 pixel minimum, with a square layout, for the logo.

LinkedIn cover photo dimensions should be at least 646 x 220 pixels
Also, you can either choose to pick an image that will last a long time, like a version of your logo, a team photo or something else that represents your company. Or, you can change your cover photo on a regular basis to reflect what your company is up to, some important announcements or the like.
Company Specialties
List up to 20 specialties of your organization. These are “keywords” that you want your page to show up for when someone is looking for a product or service on LinkedIn.
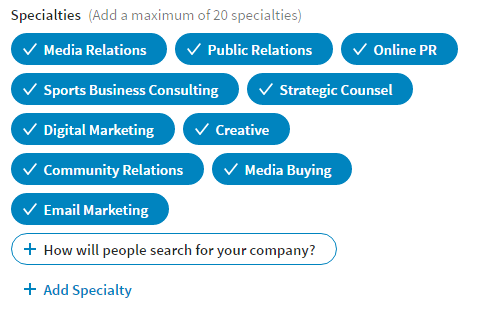
Be intentional about the terms you use for your company specialties.
Featured Groups
List up to three groups that you want your company to be associated with. Industry trade groups, nonprofit/service organizations and/or topical discussion groups are best.
What should you publish?
Now that you have your page updated with a great cover image and description, what do you do? You need to share some posts (or updates as LinkedIn calls them). There are three main items that can be shared from a company page; an article, photo, or update.
Sharing articles: these are articles or blog posts that your target audience is interested in. The best sources are your company and industry content, such as:
- Content you create (blog posts, white papers, how-to guides, etc.),
- Media hits or other content the company &/or employees are mentioned in,
- Stuff your employees publish,
- Content from partners (channel partners, vendors, nonprofits you support, etc.).
(you can now @ tag people and companies on Company Page updates)
Sharing photos, videos and updates are also good ways to keep your page content fresh and interesting. Videos are really gaining traction on LinkedIn (like they are on every social network), numbered lists get shared a lot and posts with a link typically perform better. Check out 12 Data-Backed Tips About the LinkedIn Company Page for more:
What else?
Scheduling posts: You can’t schedule posts directly on LinkedIn like you can on Facebook, so you may want to use a third party tool/app like Buffer, Hootsuite or CoSchedule.
When to post: The simple answer is to test out various posting times and see when is best for your company (meaning engagement with likes, comments and shares). Typically, weekdays during work hours are ideal on LinkedIn (not as much evening and weekend use as Facebook, Twitter and Instagram).
Page notifications: If you are worried about missing comments or questions on your page, don’t fret, but know that there is not a way to get push (email or app) notifications specifically for page updates. There is a good notification center you can access as an administrator of your page. Also be aware of what email address you have set up to receive notifications. Users often use a personal (gmail, yahoo, etc.) email address for their personal LinkedIn page. This is fine, but if you don’t frequently check that email account, you may want to change or add an email to get notices for your page at an account you do monitor consistently (like your company email).
Of course there is a lot more to a LinkedIn marketing strategy beyond getting your page created or claimed, filled out and haphazardly sharing content…but that’s another post or curriculum for that Coaching Program I mentioned.
by Connor Laubenstein | Sep 27, 2016 | Digital Marketing, General, How To, Posts, Public Relations, Resources, Social Media
Last weekend I went to a barbecue at a friend’s house. No, I didn’t just want to write that down. The week before the barbecue, I got a Facebook notification that I, along with twenty or so others, was invited. Tapping on the notification shot me right to the event page — beautifully done. One week before a barbecue for a handful of 22 year-olds, and there was a Facebook page with a creative title for the event, a long, but well written description including when and where it was to be held and a funny cover photo with the eventual party hosts next to their most prized and necessary party possession: the grill.
The page had all of the information that I would need to get there, but most importantly, it made me want to go. If I had simply gotten a text message invite from the host of the party, sure, the barbecue still would have probably fit my schedule, but I would be missing the multi-media, multi-dimensional approach. The point is, my friend successfully started an event marketing campaign via social media.
Here are some of my tips on how to execute an organized and diligent social media campaign for an event. Note that, depending on the scale of the event, you should be getting ready up to a month in advance — so plan accordingly!
Step 1: Get it all out.
Whenever I’m planning an event, the first thing I do is break out a blank piece of paper and just funnel any and every thing I know about the event, through the pen. This process can take as little as two minutes or it can take as long as half an hour. From concrete information like the date and location of the event, to abstract information like the event’s mission, the important thing is to unload it all.
Step 2: Plan your moves.
With all of the information at the ready, draw up a posting timeline. Writing down a schedule and committing to it will force you to stay active, keeping guests engaged with new content. Marketo provides a great downloadable checklist template for planning social media around an event that I’d highly recommend checking out. The trick is to be deliberate — don’t just blast people with the same posts over and over again. A few gentle reminders spread out over the week before it starts will keep the guests up to date, but won’t bog them down with notifications. You want people to get excited for your event, not resent you for it.

Step 3: Let the people know!
Once you have all of the event’s information at the ready, it’s time to start the outreach. Create a Facebook event page with the event’s information and post to relevant third-party event listing sites, like Eventful, Evvnt or ImpactFlow. Before you take these pages live, put yourself in the shoes of an invitee — would I want to go to this event based on the page I’m looking at? In the days leading up to it, send out a few reminders. Remember, on Facebook, people who have indicated that they’re interested in attending will get a notification whenever you post something, so pace out those posts. Give them a nudge, don’t punch them in the face.
Step 4: The event is here.
Today’s the day! At this point, you’ll get live, tangible results from all of your pre-work. But it’s not time to sit back and relax just yet. Make sure somebody is taking pictures and videos, capturing all of the major event moments. Post a picture or a status update to the event’s Facebook page, letting the stragglers still at home know what they’re missing.
Step 5: Go out and get some coverage.
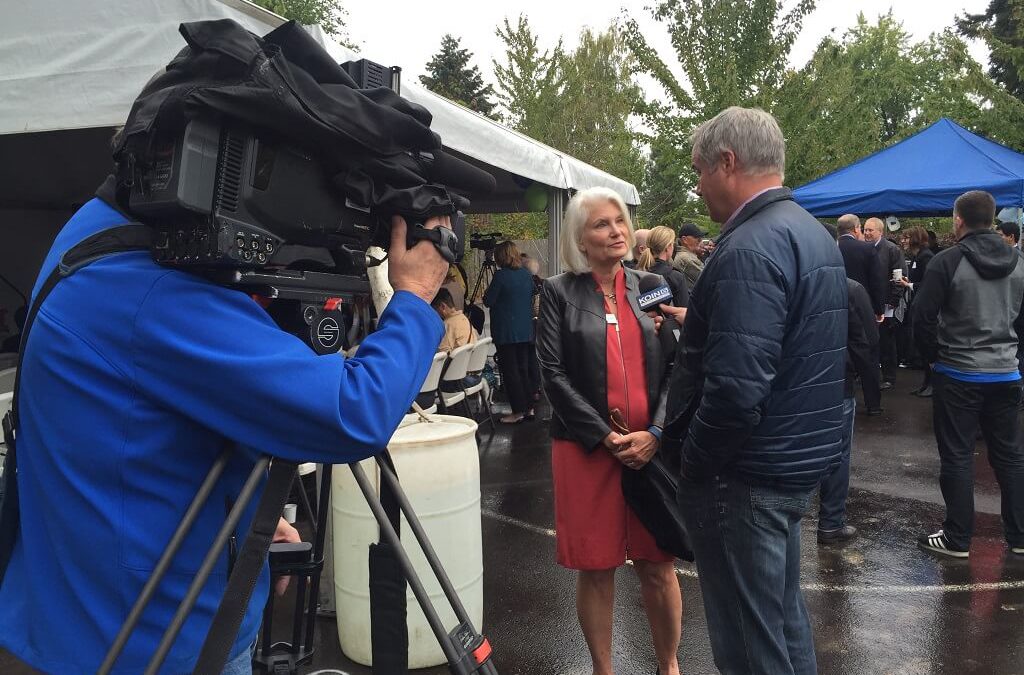
If your event has landed on any third-party listing sites, then you’ve already done some of this work. Here is where you’ve got to be honest about the event you’re putting on. Of course it would be great if you could get the local news to every event that you put on, but it probably isn’t going to work like that, so if you put an honest value on the event, you’re more likely to reach your reasonable goals. Events surrounding check presentations, ground breakings or grand openings can be perfect for attracting a local outlet.
Step 6: Don’t let them forget about it.
Once everyone has left and the dust has had time to settle, revisit that Facebook page and put up any good photos, videos or valuable quotes you got from the event. Keeping attendees engaged throughout the whole process is paramount, even after the event happened. If the same event is likely to happen again, save all of the copy you wrote, along with photos and videos. Monitoring and tracking your results will only improve your future events.
There is no denying the pervasiveness and accessibility of social media. These days all of us have platforms from which we can promote a message, and those tools can lead to incredibly innovative and unique campaigns. Even still, there are ways to optimize the means to make the message glow. Follow some of these pointers to launch a successful social media campaign that will send people flying over to your event, and most importantly, make them happy they went.
Check out the Facebook live video for more on these 6 tips.


